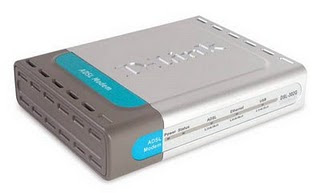
D-Link DSL-302T
|
Tuesday, January 12, 2010
|
Multimedia
|
 Modem ADSL standard (untuk 1 komputer saja) - tapi masih bisa dilengkapi dengan Linksys WRT54G supaya bisa di-sharing dengan banyak komputer. (BONUS: ADSL Splitter D-Link DSL-30CF). D-Link DSL-302T memiliki USB-port namun tidak disarankan untuk menggunakan USB-port teresebut mengingat masalah kompatibilitas driver dan kecepatan via USB tidak secepat Ethernet.
Berikut ini cara menyeting speedy biar ngk repot panggil2 teknisi datang kerumah
Default IP: 192.168.1.1
Default username : admin
Default password : admin
Default username : admin
Default password : admin
Pilih salah satu Bridge atau PPPoE
Setting Bridge
1. Pilih Setup
2. Pilih Connection
3. Bridge Connection Setup. Name: Speedy; Type: Bridge; Encapsulation: LLC; VPI=8; VCI=81, Apply
4. Pilih Tools
5. Pilih System Commands, Save All, Restart
1. Pilih Setup
2. Pilih Connection
3. Bridge Connection Setup. Name: Speedy; Type: Bridge; Encapsulation: LLC; VPI=8; VCI=81, Apply
4. Pilih Tools
5. Pilih System Commands, Save All, Restart
Setting PPPoE
1. Pilih Setup
2. Pilih Connection
3. Bridge Connection Setup. Name: Speedy; Type: PPPoE; Username: (nmrspeedy@telkom.net); Password: (password speedy); VPI=0; VCI=35, Apply
4. Pilih Tools
5. Pilih System Commands. Save All, Restart
1. Pilih Setup
2. Pilih Connection
3. Bridge Connection Setup. Name: Speedy; Type: PPPoE; Username: (nmrspeedy@telkom.net); Password: (password speedy); VPI=0; VCI=35, Apply
4. Pilih Tools
5. Pilih System Commands. Save All, Restart
Jika kamu menggunakan bridge maka kamu harus membuat Dial Up Speedy nya jg biar bisa konek  Created By Ariez Rockmariez
edit


No comments:
Post a Comment